Creating an
Automated Backyard
Astronomy Shed using
Home Assistant.
By Robert
Lane. @lanerobertlane
1
Contents
In the short
term, the aim is to control and take images from my telescope and DSLR from the
comfort of my office. This includes monitoring conditions, slewing the scope,
and viewing or scheduling a sequence of images.
In the long
term, the aim is to imitate the Automation of a robotic telescope such as The
Open University PIRATE Telescope, which uses the ABOT dashboard.
This project
should ideally be achieved using Open-Source Software and parts that I have
lying around, i.e a minimal budget. Home Assistant
already powers other areas of my home, and except for the networking gear, I
have not brought any new equipment.
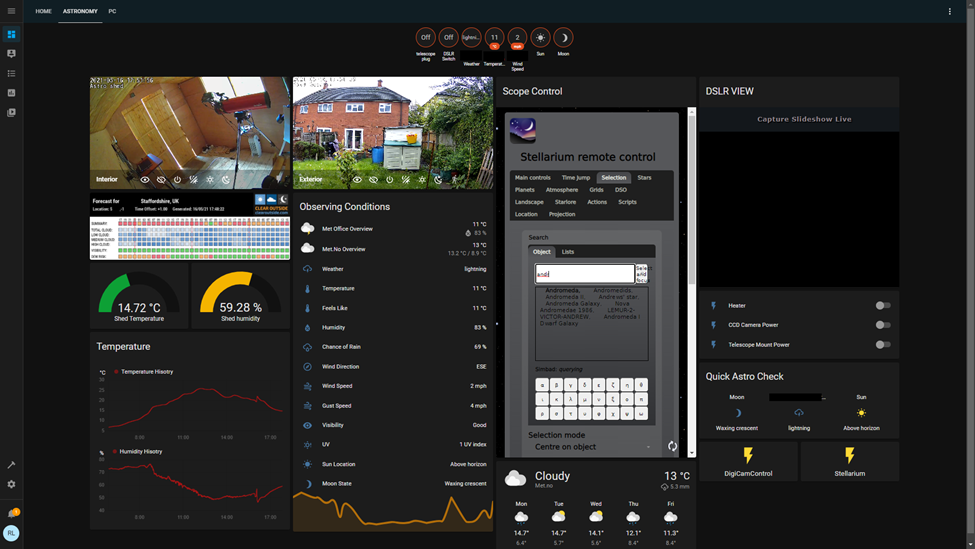
The video
shows me using the Home Assistant Dashboard to select M42 from the Sinbad
database, and then the Telescope in the top left video window slews to its
location. Then I capture an image (black image since the scope is in a closed
shed due to weather conditions) and I view it in real time. The live view from
the camera is also black due to the shed being closed and the cap being on the
scope.
4.1
Telescopes
and Cameras
SkyWatcher Star Discover P150i WiFi computerised telescope
SkyWatcher Explorer 130p telescope
Nikon D3200
DSLR
Nikon D50
DSLR
4.2
Computing
and Networking
HP Pavilion
TouchSmart 11-E101sa Laptop
TP-Link TL-SG1005D,
5 Port Gigabit Ethernet Network Switch
TP-Link
TL-WA850RE N300 Universal Range Extender
TP-Link C100
WiFi Camera
TP-LINK UB4A
Nano USB Bluetooth 4.0 Adapter
TP-Link P100
Tapo Smart Plug Wi-Fi Outlet
4.3
Environment
Monitoring
Govee Room Thermometer Hygrometer
4.4
Cables
Smartpow EH-5 EH-5A EP-5A Camera AC Power
Adapter
USB 2.0 to
RJ45 Lan Extension Extender
Nikon DSLR
D3200 USB Cable - UC-E6 USB
Home
Assistant Core - Open source home automation that puts
local control and privacy first. Powered by a worldwide community of tinkerers
and DIY enthusiasts
Various
Custom component additions to Home Assistant.
Docker - A
Container which stores my home assistant.
Lubuntu 18.04 - A fork of Lubuntu for old and slow machines.
Stellarium v0.20.4 - Planetarium software which
can control an ASCOM telescope, and has a web server
plugin.
Stellarium Scope - Stellarium
supports ASCOM natively now, this is a holdover from my previous set up.
SkyWatcher ScyScanPro
- The proprietary software which allows WiFi
communication with my Telescope.
ASCOM
platform 6 - Astronomy instrument control architectures, making
vendor-independent plug and play control.
DigiCamControl - An innovative and easy to use
solution for complex camera control.
VirtualHere USB - allows USB devices to be used
remotely over a network just as if they were locally connected.
Home
assistant is the core to my whole set up. It allows me to create a dashboard
which allows both the automation and manual control of the Astronomy Shed.

The
dashboard is fully customisable. On the left side of the screen, I have two
camera views showing the inside and outside of the Astronomy shed. An image of
the latest ClearOutside forecast for the area, and a
weather forecast from my closest Met Office weather station. I also have real
time environment temperature and humidity reports (and history) from within the
shed.
On the
right, I have embedded the Stellarium and DigiCamControl web servers. These are the meat and potatoes
of the dashboard. The Stellarium websever
allows me to query an object in the Simbad database
and slew to or track that object with the telescope. The DigiCamControl
web server allows me to see a live image from the scope and capture an image.
I cannot yet
adjust the ISO or Exposure settings, or schedule a sequence of exposures from
this server, but DigiCamControl is capable of this,
so I will implement it at some point soon.
Below that
section there are 3 toggle switches which will power on the DSLR Camera and the
Telescope mount (As well as the shed heater - If I go out to stargaze myself in
winter, its useful to have this on half hour before I go out).
At the
bottom right, are buttons which will Launch the Stellarium
and DigiCamControl applications, via MQTT CLI calls,
if they have been shut down.
The
dashboard is web-based and can be accessed on any device with a web browser.
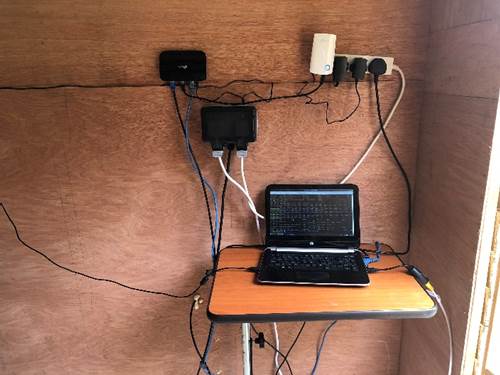
The guts of
the set up is an old laptop running Home Assistant
inside a docker on a Lubuntu linux
install. A 30m Ethernet cable from the house runs into the TP-Link mounted
router on the wall. The 2 shielded power sockets are designed for outdoor use, and have 2x 4-plug extenders to power everything. The
first 4-plug powers the equipment which does not move, such as the laptop, router and the wireless extender (which is used by the
telescope and the smart plugs to connect to the network). The Network for
everything else connects into the TP-Link mounted router.
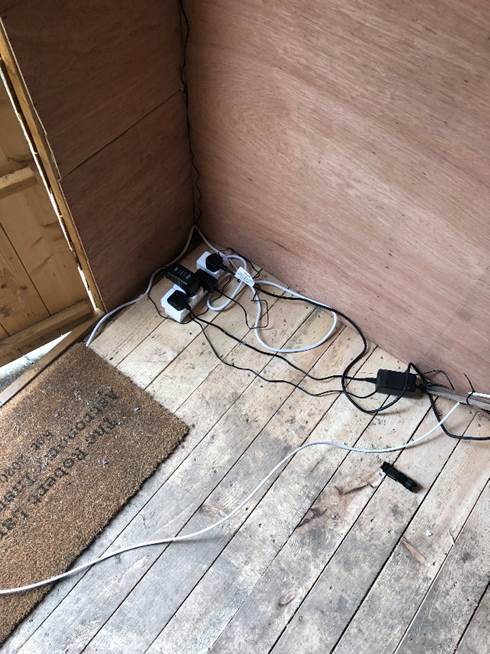
The second
4-plug powers the things which move - It has a longer cable for safety. The
Telescope and DSLR plug into TP-Link WiFi switches,
which are controlled via Home Assistant.
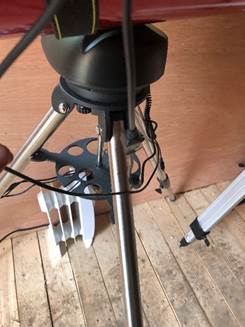
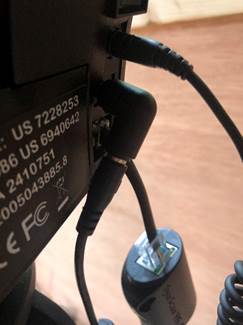
Since I have
designed this to be unmanned, the cables that run along the telescope have
breakaways which will disconnect when there is stress on them. This will
prevent damaging the cables and the telescope tipping over if they get tangled
or pulled.
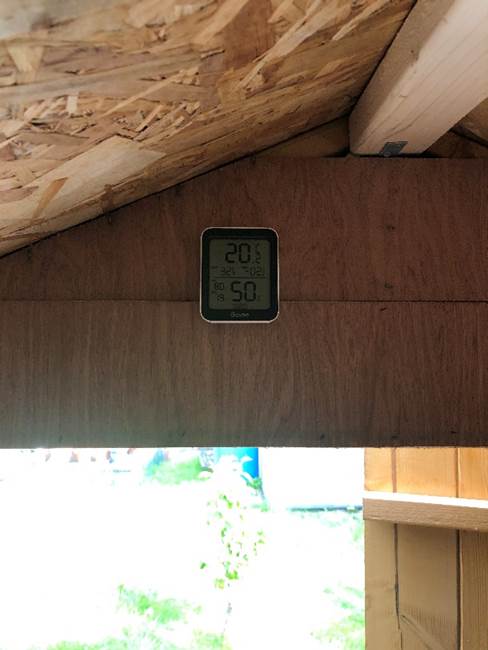
Above the
door is also a BLE temperature and humidity sensor, which reports to Home
Assistant the conditions in the shed. Since I also have my Octopus Energy
electricity rates visible in home assistant this
allows me to do simple automations. For example, if the Energy price is cheep
enough and the shed is below freezing then turn on the heater.
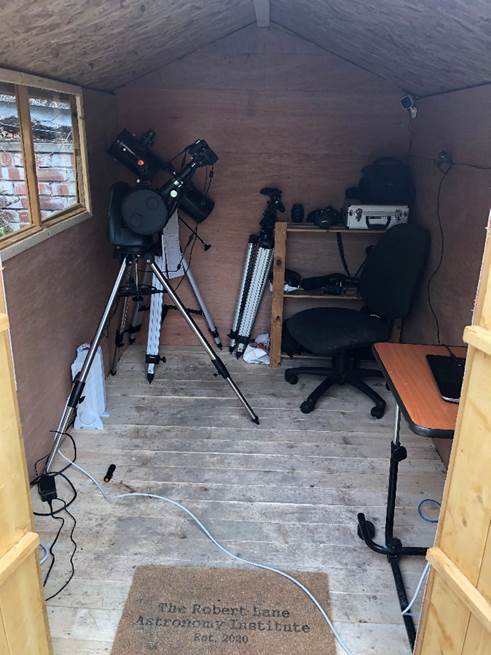
And of course the shed would not be complete with a welcome mat
I received as a present.
My immediate
next step is to edit the dashboard to include DigiCamControl
settings to adjust ISO and Exposure and set up a schedule of shots to take
throughout the night.
I would then
also like to set up a weather station to more accurately get
the weather details.
I would also
like to add an All-sky camera mounted to the roof of the shed, so I can quickly glace at the conditions and also feed into the UK
Meteor Network.
The pipe
dream is to then have some sort of Arduino set up, which would open the doors
and move a platform carrying the scope into its position. I am imagining it on a
track, with stepper motors to open the doors and a motor to power the platform.
Home Assistant would really come into its own then, with automations that would
allow the scope to retract back into the shed and close the doors in the event
the weather station detects rain or cloud, and to automatically open the shed
and wheel out the scope and start a pre-programmed sequence of images if the
sky is clear.
I think its pretty obvious why that is the last step of this crazy pipe-dream.
If you have
any questions about the set-up you can find me over on
Twitter: @lanerobertlane
Rob Lane.